
 The Up/Down Mod brings back this cool feature of the TW1 by mimic-ing the circuit. The Up/Down Mod brings back this cool feature of the TW1 by mimic-ing the circuit.The AW2 is hardwired into the "Down" mode. In this case the bandpass filter starts with a low center frequency, rushes up to the upper frequency of the sweep, then returns back down. The "Up" mode works exactly opposite. Also, the "Up" mode reverses the Sensitivity pot throw, so make sure you mirror-mage the Sensitivity control to get the "Up" effect. This sounds much more like a Mu-Tron than the "Down" mode does. This is also a complex mod because it requires cutting traces. Proceed only if you dare. | |
STEP 1: Locate and cut the traces  Click on this image to get a super-large blowup of the traces. You need to cut the two traces shown in the white circles. Use an exacto knife and be careful. Use an ohm meter to verify that you have indeed severed the connections in these locations. Click on this image to get a super-large blowup of the traces. You need to cut the two traces shown in the white circles. Use an exacto knife and be careful. Use an ohm meter to verify that you have indeed severed the connections in these locations.The top circle shows the cut trace from pin 5 to pin 3. Pin 3 is on the left. The lower circle shows the disconnection of pin 5 from Vhs (the half-supply bias voltage). Pin 3 needs to be connected back to Vhs, so you need to do this next using a short jumper wire, shown here. | |
STEP 2: Add Mod wires  Click on the image to enlarge it. The 3 new wires will go to the three pins of the SPDT switch. The wires are numbered in the image. Wire 2 will go to the center pin on the switch. the other two wires will go to the other two pins on either side of the center. This will replicate the original TW1 Up/Down switch. The 47k resistor present in the TW1 is not in the AW2, and it is normally used for the "Down" position so there is no need to replace it here. Click on the image to enlarge it. The 3 new wires will go to the three pins of the SPDT switch. The wires are numbered in the image. Wire 2 will go to the center pin on the switch. the other two wires will go to the other two pins on either side of the center. This will replicate the original TW1 Up/Down switch. The 47k resistor present in the TW1 is not in the AW2, and it is normally used for the "Down" position so there is no need to replace it here. | |
STEP 3: Wire the Switch  The switch is simple to wire with the 3 wires you added in the last step. Just follow the numerical directions in Step 2 and wire up the SPDT. The switch is simple to wire with the 3 wires you added in the last step. Just follow the numerical directions in Step 2 and wire up the SPDT. | |
STEP 4: Wire and Test Fit  Wire up the switch (don't forget the heat shrink tubing where necessary. Then test fit it in the enclosure. The switch is the upper of the two switches in the image - it has no components connected to its pins. Wire up the switch (don't forget the heat shrink tubing where necessary. Then test fit it in the enclosure. The switch is the upper of the two switches in the image - it has no components connected to its pins.Remember, this mod reverses the Sensitivity knob! | |
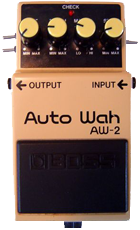
AW2 AutoWah Mods
Here are some interesting mods for the AW2 AutoWah, the child of the TW-1 Touch Wah.
|
|
These mods are of my own design and I have not seen them anywhere else. The schematics are not documented for the AW2, but its predecessor the TW1 is documented and is nearly identical. BOSS, AutoWah, Touch Wah, and AW-2 ARE TRADEMARKS OF THE ROLAND CORPORATION AND ARE USED FOR REFERENCE ONLY. THIS SITE IS NOT AFFILIATED WITH THE ROLAND CORPORATION IN ANY WAY.

Up/Down Switch Mod
Subscribe to:
Post Comments (Atom)


3 comments:
I did the Instant attack mod first, then this one. This one seems to have no effect or affect at all.
the sensitivity knob gets reversed so you have to play with it to get the effect. One day I will post some sound clips...
How can get reversed sensitivity knob? I have to change something in somewhere? Thanks a lot for your help!
Post a Comment